 Save
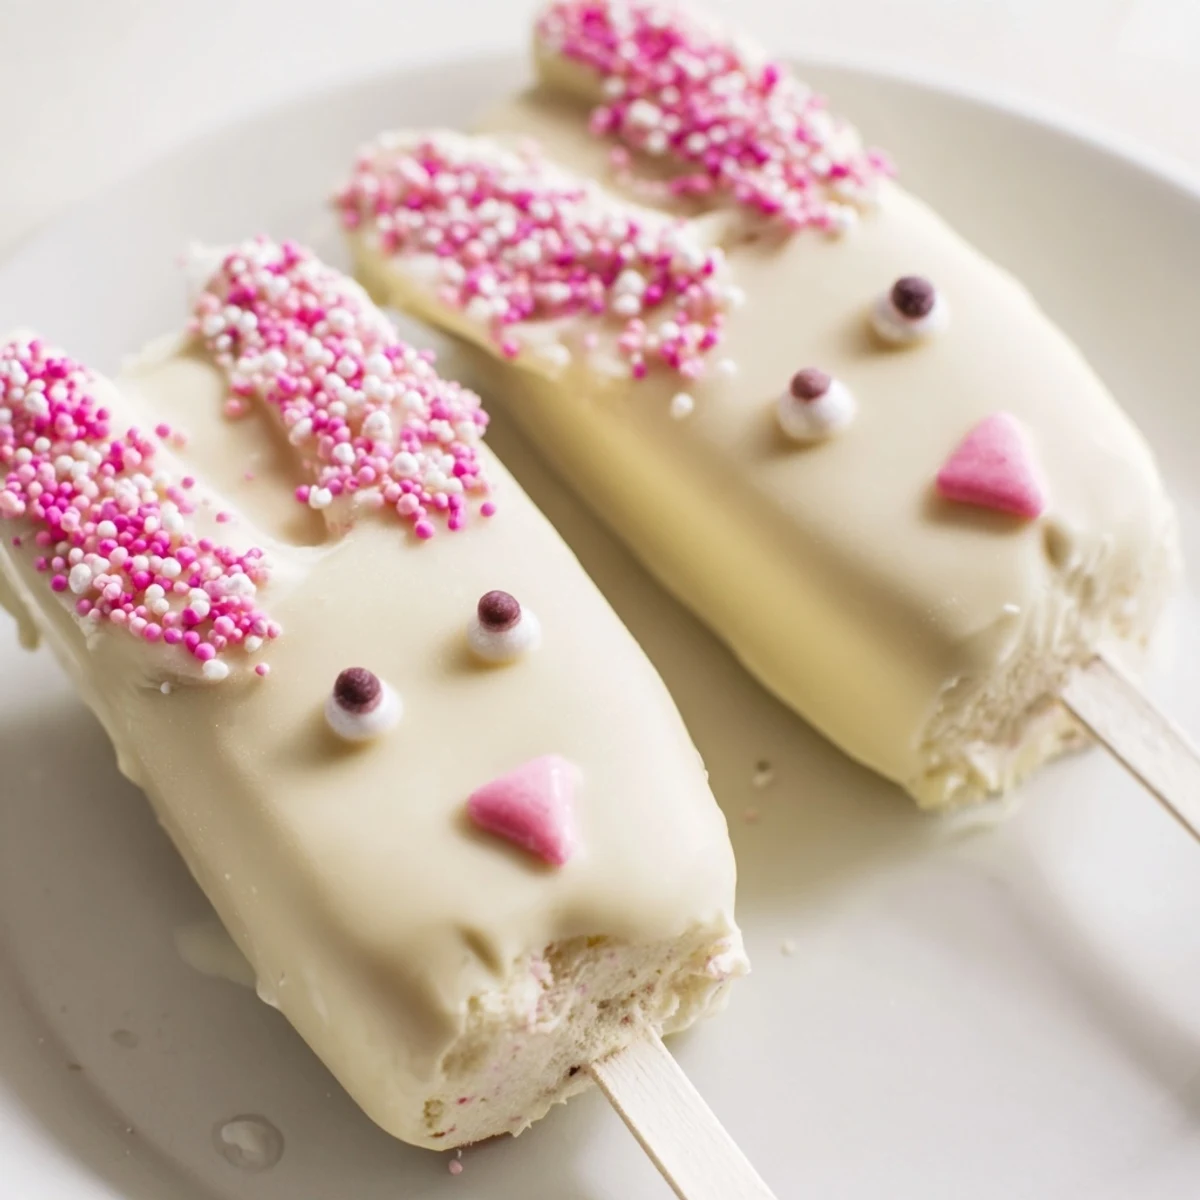
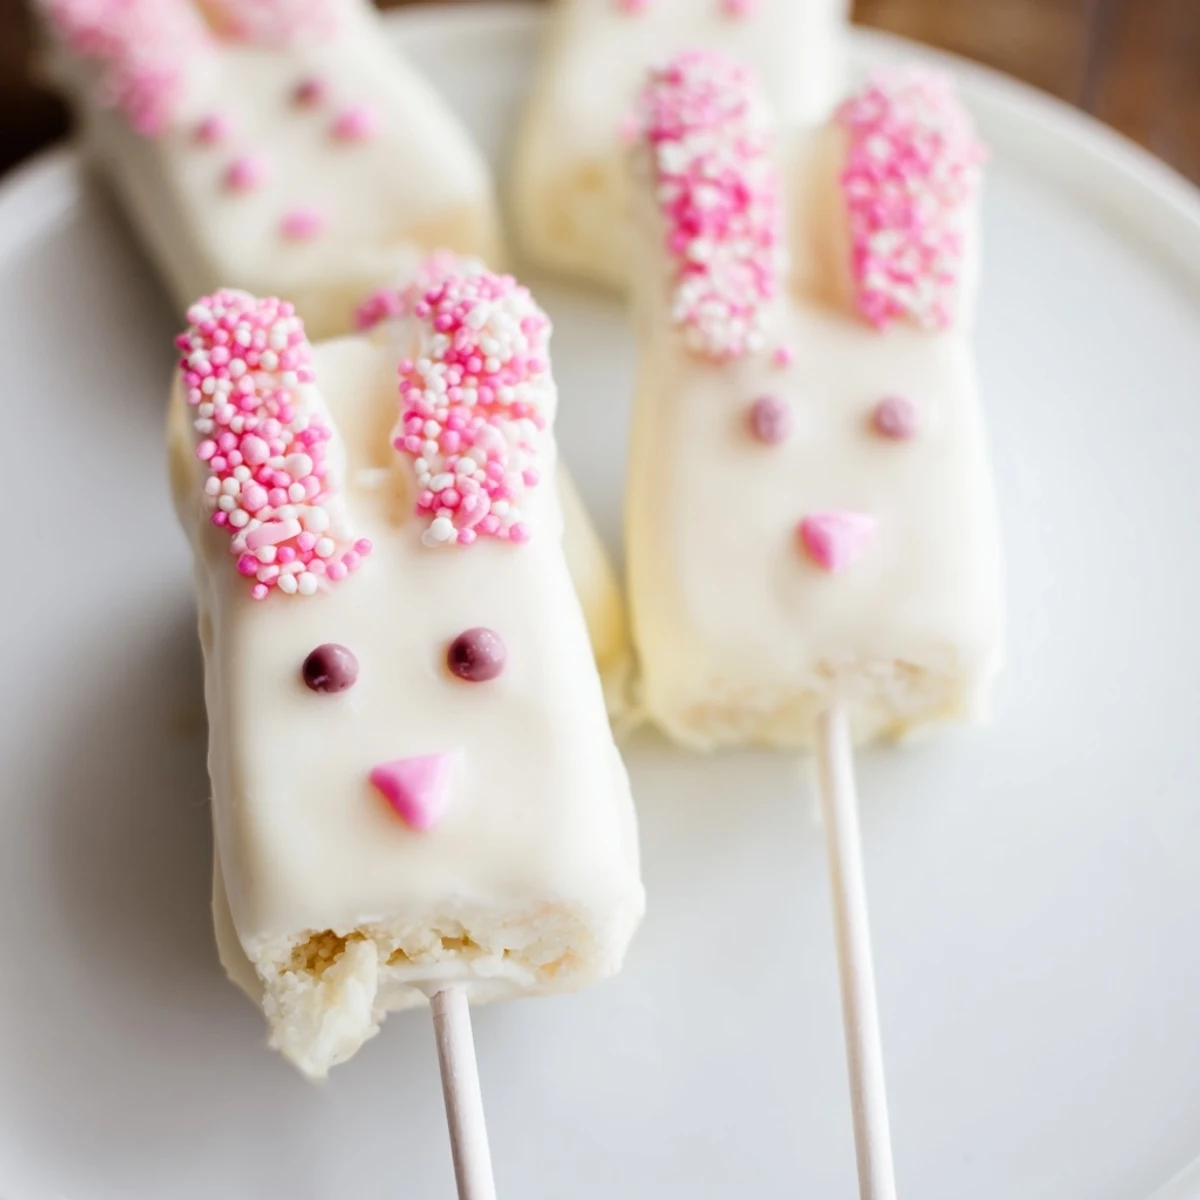
Save These festive bunny-shaped cakesicles combine moist vanilla cake with a rich white chocolate coating, creating adorable treats that capture the spirit of Easter. The cake mixture uses vanilla cake crumbs blended with cream cheese, butter, and powdered sugar for a dough that holds its shape perfectly. After forming flattened ovals and inserting sticks, chill until firm, then dip in melted white chocolate. Decorate with candy eyes, sprinkles, or fondant ears and noses for personalized touches. The entire process takes just an hour, yielding eight charming desserts that kids and adults will love. Store them in the refrigerator for up to three days, or customize with different cake flavors like chocolate or lemon for variety throughout the spring season.
Last Easter, my kitchen became a sprinkle-strewn battlefield after my niece suggested we make "bunny popsicles"—her words, not mine. We ended up with cake everywhere, white chocolate smeared on aprons, and the most lopsided, joyful bunny faces you've ever seen. Now it is not Easter without these adorable cakesicles making an appearance on the dessert table.
I brought a batch to my book club and watched grown women coo over tiny bunny faces like they were puppies. Something about food on a stick makes everything feel more festive and fun. Plus, they are easier to serve than slicing an actual cake when everyone is mingling.
Ingredients
- Vanilla cake crumbs: I have used everything from leftover birthday cake to grocery store cupcakes—anything works as long as you crush it into fine crumbs
- Cream cheese: Softened to room temperature so it blends seamlessly into the cake crumb mixture without any lumps
- Unsalted butter: Adds richness and helps bind everything together into a moldable dough
- Powdered sugar: Just enough to sweeten the filling without making it cloyingly sweet
- Vanilla extract: Pure vanilla extract makes a noticeable difference in the overall flavor
- White chocolate or white chocolate melts: Melts are easier to work with since they are formulated for coating, but good quality white chocolate chips work too
- Edible gel food coloring: Gel coloring works better than liquid for adding small details like pink noses and inner ears
- Cakesicle sticks: Regular popsicle sticks are too thin—these thicker wooden sticks hold the weight better
- Sprinkles, candy eyes, or fondant decorations: This is where you can get creative and let your personality shine through
Instructions
- Make the cake mixture:
- In a medium bowl, mix cake crumbs, cream cheese, butter, powdered sugar, and vanilla extract until you have a dough-like consistency that holds together when squeezed. The mixture should feel like Play-Doh—moist but not sticky.
- Shape the bunnies:
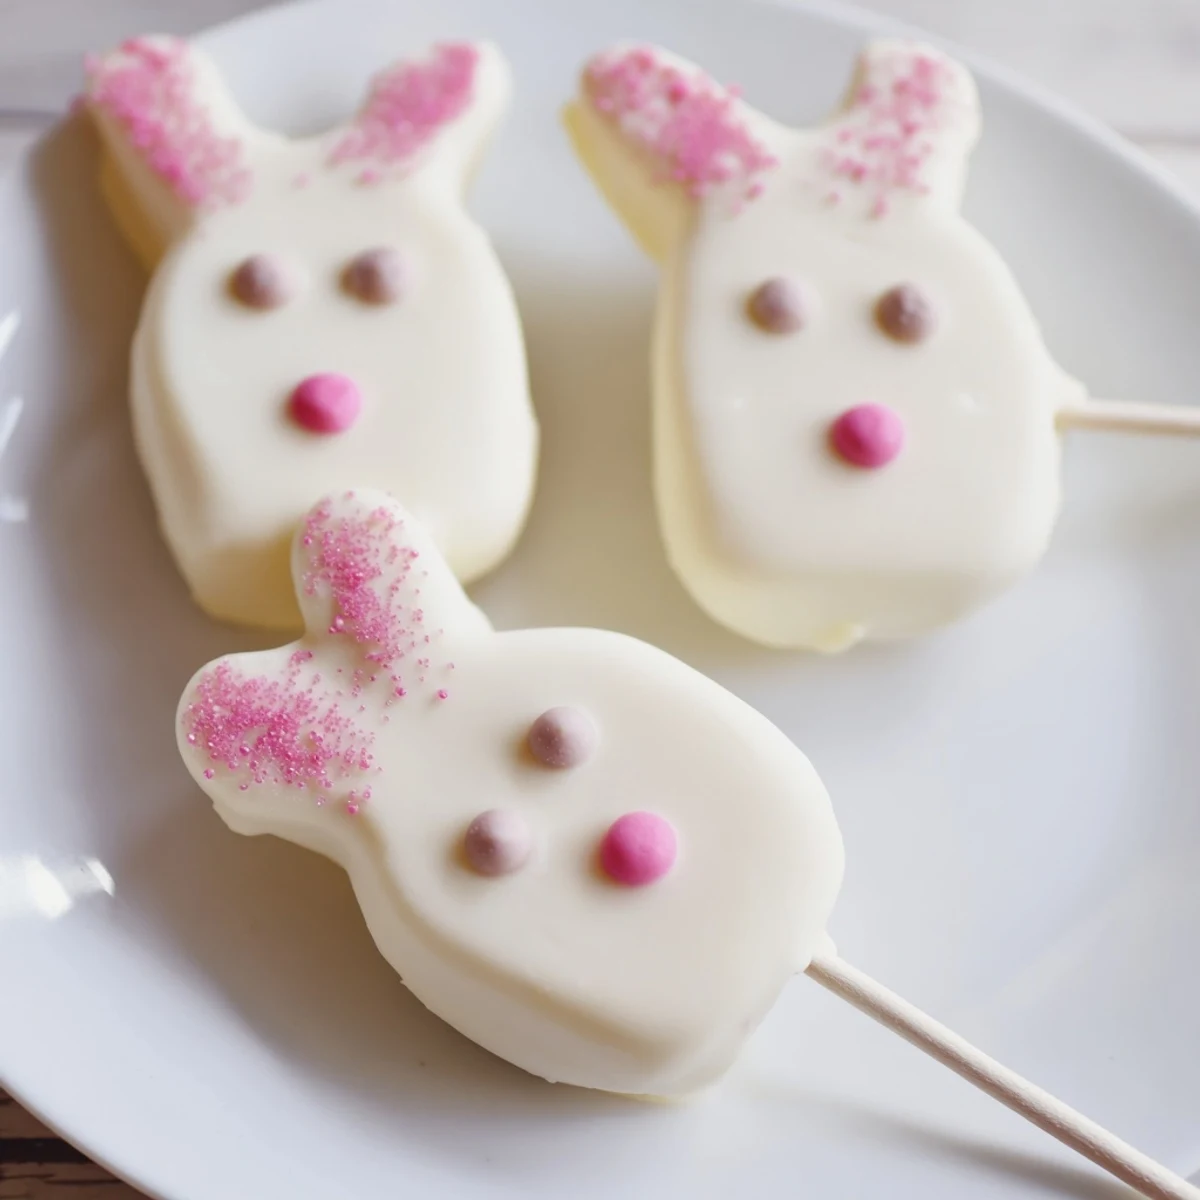
- Divide the mixture into 8 equal portions and roll each into a ball, then gently flatten into an oval shape with a slightly pointed top for bunny ears. Use your fingers to pinch two ear shapes at the top of each oval.
- Add the sticks:
- Insert a cakesicle stick about halfway into each bunny shape, then gently reshape around the stick to secure it. Place them on a parchment-lined baking sheet and refrigerate for 20 to 30 minutes until firm to the touch.
- Melt the coating:
- Melt the white chocolate in a microwave-safe bowl in 30-second bursts, stirring between each interval until completely smooth and glossy. Be careful not to overheat it or the chocolate will seize and become unusable.
- Coat the cakesicles:
- Dip each chilled cake pop into the melted white chocolate, tilting the bowl to coat completely. Lift it out and tap your wrist gently to shake off excess chocolate, then rotate it to help the coating set evenly.
- Add decorations:
- Immediately place candy eyes, a pink sprinkle nose, and any other decorations while the chocolate is still soft so they adhere properly. Work quickly—one or two cakesicles at a time—before the coating hardens.
- Set and serve:
- Let the cakesicles set completely at room temperature for about 30 minutes, or refrigerate for 10 to 15 minutes if you are in a hurry. Use food coloring pens to add whiskers or other details once the coating is fully set.
 Save
Save My sister-in-law texted me the next day saying her daughter insisted on taking her bunny cakesicle to school for show-and-tell. There is something about these treats that brings out the kid in everyone, even the skeptical ones who claim they are too old for cute food.
Getting The Shape Right
I learned the hard way that making perfectly symmetrical bunny ears is trickier than it looks. If you are struggling with freehand shaping, consider investing in a bunny-shaped cakesicle mold—it makes the process foolproof and every bunny comes out looking identical.
Flavor Variations
Chocolate cake crumbs with a dark chocolate coating creates a stunning black-and-white tuxedo bunny effect. Lemon cake with white coating and yellow accents feels incredibly springlike, while red velvet with pink-dyed white chocolate looks almost too pretty to eat.
Serving And Storage Tips
These travel surprisingly well if you wrap each one individually in clear treat bags tied with pastel ribbons. They make excellent party favors or place settings for an Easter brunch.
- Stand them upright in a jar filled with Easter grass or jelly beans for a gorgeous display
- If the chocolate coating starts to look dull, give it a quick buff with a clean, soft cloth
- Store them in a single layer in an airtight container with parchment paper between layers
 Save
Save Whether you are making these for a crowd or just because Tuesday needed more whimsy, these bunny cakesicles deliver joy in every bite. Happy Easter, and may your sprinkles always be plentiful.
Recipe Questions & Answers
- → How far in advance can I make these bunny cakesicles?
-
Prepare these treats up to three days before your celebration. Store them in an airtight container in the refrigerator to maintain freshness and prevent the white chocolate coating from becoming soft or discolored.
- → Can I use different cake flavors besides vanilla?
-
Absolutely. Chocolate cake crumbs create a delicious contrast with the white chocolate coating, while lemon or strawberry flavors add bright spring notes. Just ensure the crumbs are finely crushed for smooth shaping.
- → What's the best way to melt white chocolate for coating?
-
Melt white chocolate in a microwave-safe bowl using 30-second intervals, stirring thoroughly between each burst. This gentle heating prevents seizing and ensures a smooth, dip-consistency perfect for coating cakesicles.
- → Do I need a special mold to make bunny shapes?
-
No mold is required. Hand-shape the cake mixture into flattened ovals resembling bunny faces. However, cakesicle molds can help achieve uniform sizes if you prefer consistent results across all eight treats.
- → How can I create the marbled white chocolate effect mentioned in the notes?
-
Gently swirl a small amount of pink gel food coloring into melted white chocolate using a toothpick. Avoid over-mixing to maintain distinct marbled patterns rather than fully blended colors, then dip as usual.
- → What alternatives work for bunny ears if I don't have fondant?
-
Pretzel sticks make charming rustic ears, while modeling chocolate offers pliable shaping options. You can also pipe ears using colored candy melts or use small candy-coated chocolate pieces for simple decorative touches.
