 Save
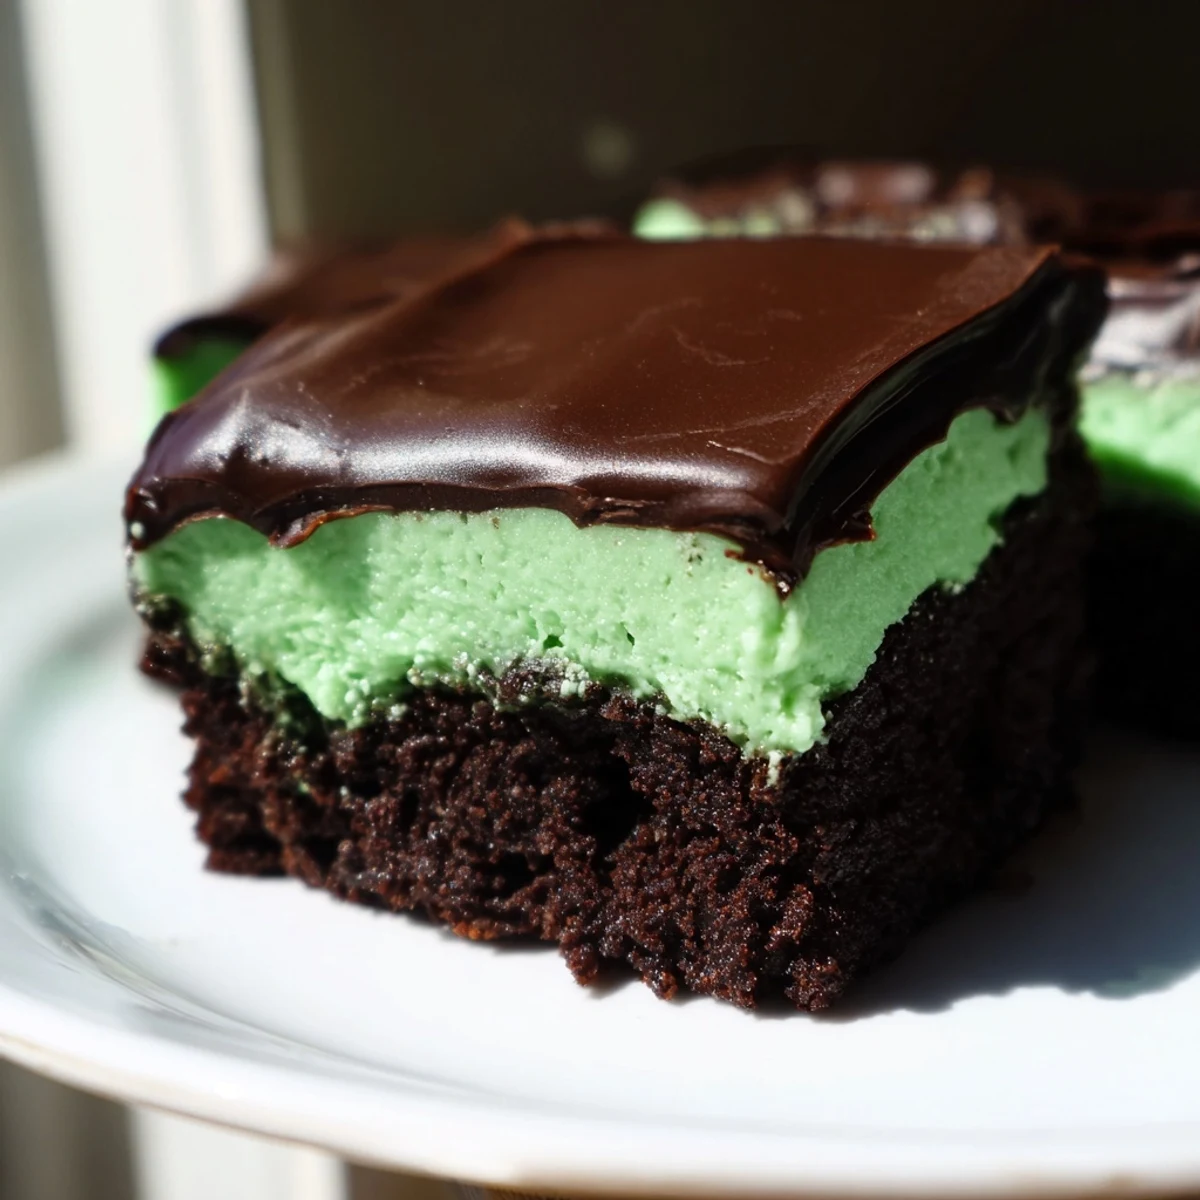
Save These rich, fudgy chocolate brownies combine the deep cocoa flavor with a refreshing peppermint layer, finished with a glossy chocolate ganache. The brownie base is moist and dense, providing a perfect contrast to the light, fluffy mint frosting. Bright green coloring adds an eye-catching touch, making them ideal for chocolate and mint lovers. The process involves baking the brownie base, preparing a creamy mint frosting, and topping it with silky chocolate ganache, resulting in an indulgent layered dessert.
The fluorescent glow of a bakery case at 2 AM changed everything for me. I had stumbled into an all night diner after a cancelled flight, desperate for anything that wasn't airport pretzels, and there sat these absurdly green brownies that looked like they belonged in a cartoon. One bite and I understood: the mint wasn't shy, the chocolate wasn't playing second fiddle, and somehow the whole thing felt like a secret handshake between childhood candy and grown up decadence.
I made these for my neighbor's porch birthday party last March, the kind of gathering where everyone stood six feet apart and yelled compliments across the driveway. She had mentioned missing her grandmother's grasshopper pie, and I figured brownies traveled better. Watching her face when she bit into one—eyes closing, shoulders dropping—that's when I knew this recipe had earned permanent residence in my kitchen.
Ingredients
- Unsalted butter: The backbone of both brownie and frosting; using unsalted lets you control the salt balance rather than guessing what the manufacturer added.
- Granulated and brown sugar: The combination creates that elusive crackly top while keeping the interior dense and fudgy; brown sugar brings subtle caramel notes that play beautifully with mint.
- Large eggs: Room temperature eggs emulsify into the butter more smoothly, creating that glossy batter that bakes up with the perfect chew.
- Vanilla extract: Often overlooked in chocolate recipes but essential here, rounding out the harsh edges of cocoa and bridging into the mint layer.
- All purpose flour: Just enough to hold everything together without crossing into cake territory; overmeasuring is the enemy of fudgy brownies.
- Unsweetened cocoa powder: Dutch process works beautifully here for deeper color and smoother flavor, though natural cocoa brings pleasant acidity.
- Salt and baking powder: Salt amplifies chocolate intensity while the small amount of leavening prevents brick like density.
- Powdered sugar: Dissolves completely into the butter for that silky frosting texture; sifting prevents lumps that stubbornly refuse to smooth out.
- Peppermint extract: Start conservative and taste; peppermint oil and extract vary wildly in strength, and toothpaste brownies help no one.
- Green food coloring: Purely optional visual cue that signals mint to the brain before the first bite; gel colors give more vibrancy with less liquid.
- Semi sweet chocolate chips: The ganache needs chocolate with enough cocoa butter to set firm but not so dark it overwhelms the mint.
- Heavy cream: Creates that pourable ganache that firms to a soft snap in the refrigerator.
Instructions
- Melt and mingle:
- Melt your butter in short bursts, watching for that moment when the last solid chunk surrenders. Whisk in both sugars while the butter's still warm; you'll feel the mixture shift from gritty to something almost like wet sand at low tide.
- Bring in the eggs:
- Add them one at a time, beating until each disappears completely before the next joins. The batter should look glossy and thick, like melted chocolate ice cream.
- Fold with restraint:
- Sift your dry ingredients directly over the bowl to avoid cocoa powder explosions. Fold until you stop seeing flour streaks, then stop; overworking develops gluten and leads to cakey brownies.
- Bake with patience:
- The toothpick test here means moist crumbs clinging, not a clean withdrawal. The brownies continue cooking from residual heat, and that slight underbake ensures fudgy centers.
- Whip the green layer:
- Beat softened butter until it looks like pale yellow frosting, then add powdered sugar in batches. The mixture will look impossibly dry before the milk and extract transform it into something fluffy and spreadable.
- Chill between layers:
- That twenty minute refrigerator rest seems optional but isn't; warm brownies melt the frosting, creating a muddy layer instead of distinct strata.
- Ganache in bursts:
- Microwave chocolate and cream together, stirring between each burst. The mixture looks grainy and wrong until suddenly it doesn't, becoming glossy and pourable in seconds.
- Final set:
- The cold ganache needs time to firm up; rushing means squished layers when you cut. Use the parchment sling to lift the whole block out for cleanest slicing.
 Save
Save My nephew once ate three of these before announcing he didn't like mint, then asked for a fourth. That's when I realized this recipe transcends preferences; it creates converts through sheer textural pleasure and balanced sweetness.
The Case for Room Temperature Everything
Cold butter fights your mixer, cold eggs refuse to emulsify, and cold cream seizes chocolate instead of melting it. I set everything out while the oven preheats, which also happens to be exactly how long it takes to talk myself out of eating the chocolate chips straight from the bag.
Reading Your Brownies
The surface tells you everything. A matte, slightly crackled top means you've hit the sugar ratio sweet spot. If the center puffs dramatically and collapses, your oven ran hot or you overmixed. The edges should pull slightly from the pan while the center remains just set.
Cutting Clean Squares
A hot knife run under water then wiped dry slides through cold set brownies without dragging the layers. I mark my cuts first, then commit, wiping the blade between each slice. The scraps that don't make perfect squares? Those are the cook's tax, traditionally paid immediately.
- Score the top lightly with a toothpick before cutting if you want professional looking edges.
- Chill the brownies until genuinely cold; lukewarm ganache smears and mint layer squishes.
- Save the parchment corners for yourself; they're always slightly imperfect and completely delicious.
 Save
Save These brownies have outlasted three apartments, two relationships, and my brief misguided fling with low fat baking. Some recipes earn their keep through reliability; this one does it by making people pause mid conversation and reach for another square.
Recipe Questions & Answers
- → How can I ensure brownies are fudgy?
-
Use a balance of butter and sugar and avoid overbaking. Mixing gently after adding the flour keeps the texture dense and moist.
- → What gives the mint layer its vibrant green color?
-
The mint layer includes optional green food coloring that enhances its appearance without altering the flavor.
- → Can I use fresh mint instead of peppermint extract?
-
Fresh mint can impart flavor but won’t be as concentrated or stable as peppermint extract in the frosting.
- → How long should the ganache chill before serving?
-
Chill the ganache for at least 30 minutes until it is set and glossy for clean slicing and best texture.
- → What’s the best way to store these brownies?
-
Store in an airtight container in the refrigerator for up to 5 days to maintain freshness and texture.
