 Save
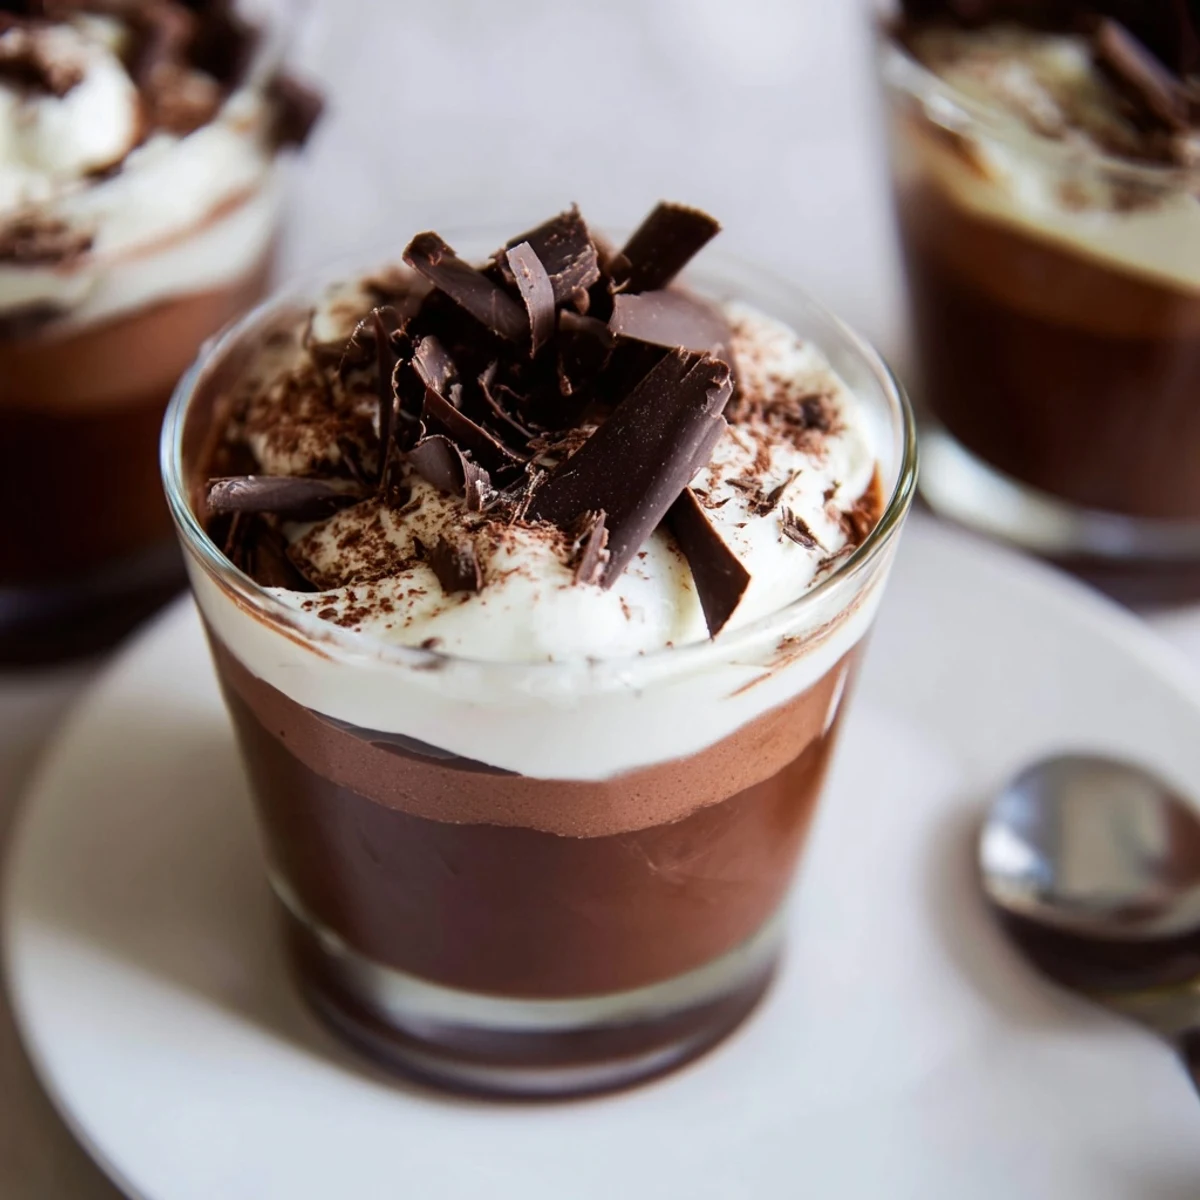
Save Build three layers: dark, milk and white chocolate by folding melted, cooled chocolate into yolk and sugar, then gently folding in softly whipped cream. Spoon or pipe into six small cups, chilling between layers and allow at least 1 hour to set. Garnish with shavings or cocoa. For a quicker set, brief freeze between layers; use high-quality chocolate.
One rainy afternoon, the only soundtrack was the steady clinking of spoons against glass as I experimented with chocolate mousses in my tiny kitchen. Layering them was a leap of faith that paid off—the swirl of chocolates looked almost too perfect to eat. The first spoonful, cool and silky, convinced me I was onto something special. This dessert became my backup plan for any gathering where I wanted wide eyes and happy sighs.
The first time I served these mousse cups, my friends passed them around in awe before finally digging in, giggling as they tried to scoop all three layers in one bite. We ended up comparing which chocolate mousse we liked best, and even the self-proclaimed 'white chocolate skeptic' went back for seconds. Seeing everyone's faces light up, I knew these would become a requested party staple.
Ingredients
- Dark chocolate (100g, minimum 60% cocoa): Go for a bar you like eating plain—the intense flavor is what gives the bottom layer its depth.
- Milk chocolate (100g): This balances sweetness between the dark and white, creating a comforting middle layer; use the best quality you can.
- White chocolate (100g): Splurge here if you can—real cocoa butter makes the top mousse extra luscious.
- Egg yolks (3, one for each mousse): Separate carefully; a hint of white can prevent the mousse from reaching peak creaminess.
- Sugar (4 1/2 tbsp, divided): Just enough to bring out the chocolates' personalities without making things cloying.
- Heavy cream (300ml, cold, divided): The backbone of all three mousses—a cold bowl and beaters are your secret weapons for strong peaks.
- Shaved chocolate or cocoa powder (for garnish): I like using two kinds for a playful finish and extra texture.
Instructions
- Melt the chocolate:
- Chop the dark chocolate and gently melt it over a bain-marie or in the microwave, stirring until smooth and glossy.
- Make the mousse base:
- Whisk the egg yolk with sugar until pale, then stir in the cooled melted chocolate; it should almost ripple as you combine them.
- Whip the cream:
- In another bowl, beat heavy cream until soft peaks hold their shape but aren’t stiff—it should look like clouds just before a storm.
- Fold in and layer:
- Gently fold the whipped cream into the chocolate mixture in thirds, keeping things airy before spooning into the bottoms of your serving cups.
- Repeat and chill:
- Repeat these steps for the milk and white chocolate mousses, layering each carefully and chilling cups in between to keep lines clean.
- Garnish and serve:
- Right before you’re ready to wow your guests, finish with a flourish of shaved chocolate or a sprinkle of cocoa powder.
 Save
Save I still remember my niece delicately pressing her nose to the glass, watching the mousse layers as they set, declaring it the 'prettiest dessert' she’d ever seen. That fleeting moment of pride and laughter turned this recipe into one of my family’s new celebratory traditions.
Finding the Perfect Chocolate
I used to think any chocolate would do, but the difference between decent and extraordinary really does come down to quality. A chocolate you enjoy snacking on instantly elevates the mousse and gives each layer its own character.
Chilling and Layering Hacks
Years of trial and error taught me to use my freezer between layers—not just the fridge—so the layers stay distinct and the presentation looks professional. Just don’t forget them in there, because frozen mousse means you need extra patience before serving.
When Things Go Not-Quite-Right
Once I left a batch on the counter too long and the mousse lost its structure, but it still tasted heavenly—assemble with confidence, knowing that even mistakes are delicious.
- If your mousse looks too loose, chill it a little longer before adding the next layer.
- A little splash of coffee liqueur in the dark chocolate layer adds grown-up flair.
- Don’t skip the garnish—it takes these cups from simple dessert to celebration.
 Save
Save This dessert has a way of inviting smiles even before the first bite—here’s to letting every spoonful feel like a small celebration.
Recipe Questions & Answers
- → How do I prevent the mousse from splitting when folding?
-
Ensure melted chocolate is cooled slightly before combining with yolk and sugar, and fold gently to retain air. Fold in whipped cream in small additions with a light hand to keep a smooth, airy texture.
- → Can I use pasteurised eggs or an egg substitute?
-
Use pasteurised egg yolks for safety without changing texture. For an egg-free approach, replace yolks with a stabilized whipped cream and a small amount of cream cheese or mascarpone to mimic richness.
- → What’s the best way to layer cleanly in cups?
-
Chill each layer briefly before adding the next. Use a piping bag or a spoon held close to the previous layer to avoid breaking through and to create even, neat layers.
- → How can I speed up the setting between layers?
-
Place cups in the freezer for 20–30 minutes between layers to firm them more quickly, then finish chilling in the refrigerator for a smoother texture before serving.
- → Which chocolates work best for each mousse?
-
Choose high-quality dark chocolate (60%+ cocoa) for depth, creamy milk chocolate for balance, and a good white chocolate with a real cocoa butter base to ensure a silky, stable white mousse.
- → Any tips for a glossy, stable mousse finish?
-
Cool melted chocolate to slightly warm, not hot, before combining with yolk; avoid over-whipping cream; and chill fully. A small splash of coffee liqueur in the dark layer enhances flavor without affecting stability.
