 Save
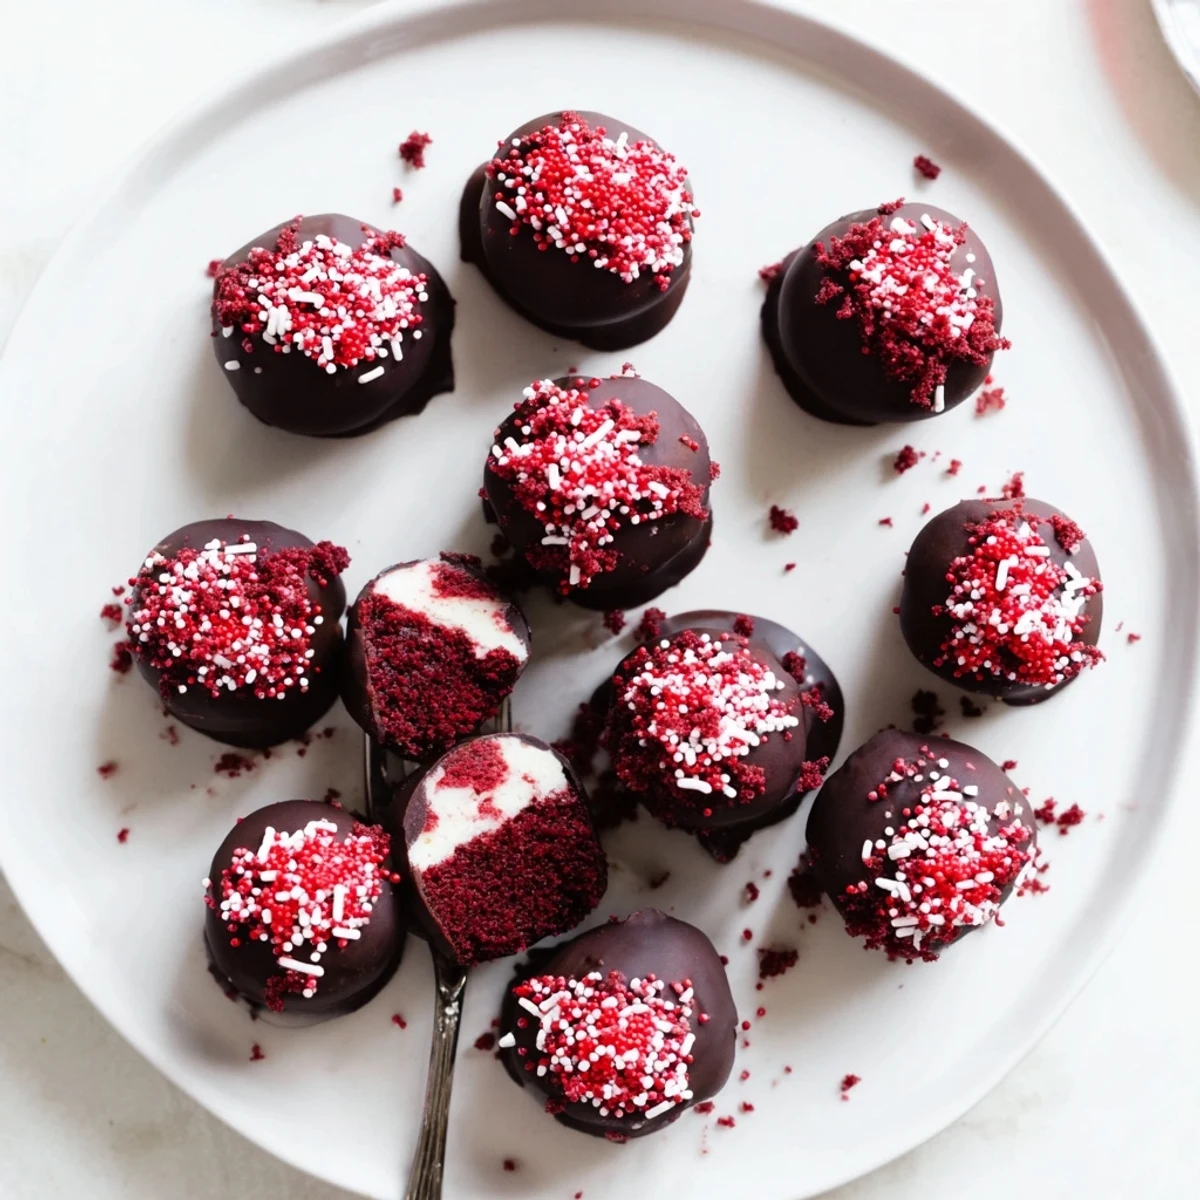
Save These red velvet cheesecake balls combine the best of both worlds—rich, moist red velvet cake swirled with tangy cream cheese filling, all dipped in velvety chocolate. Each bite delivers the classic red velvet flavor with a luxurious creamy center.
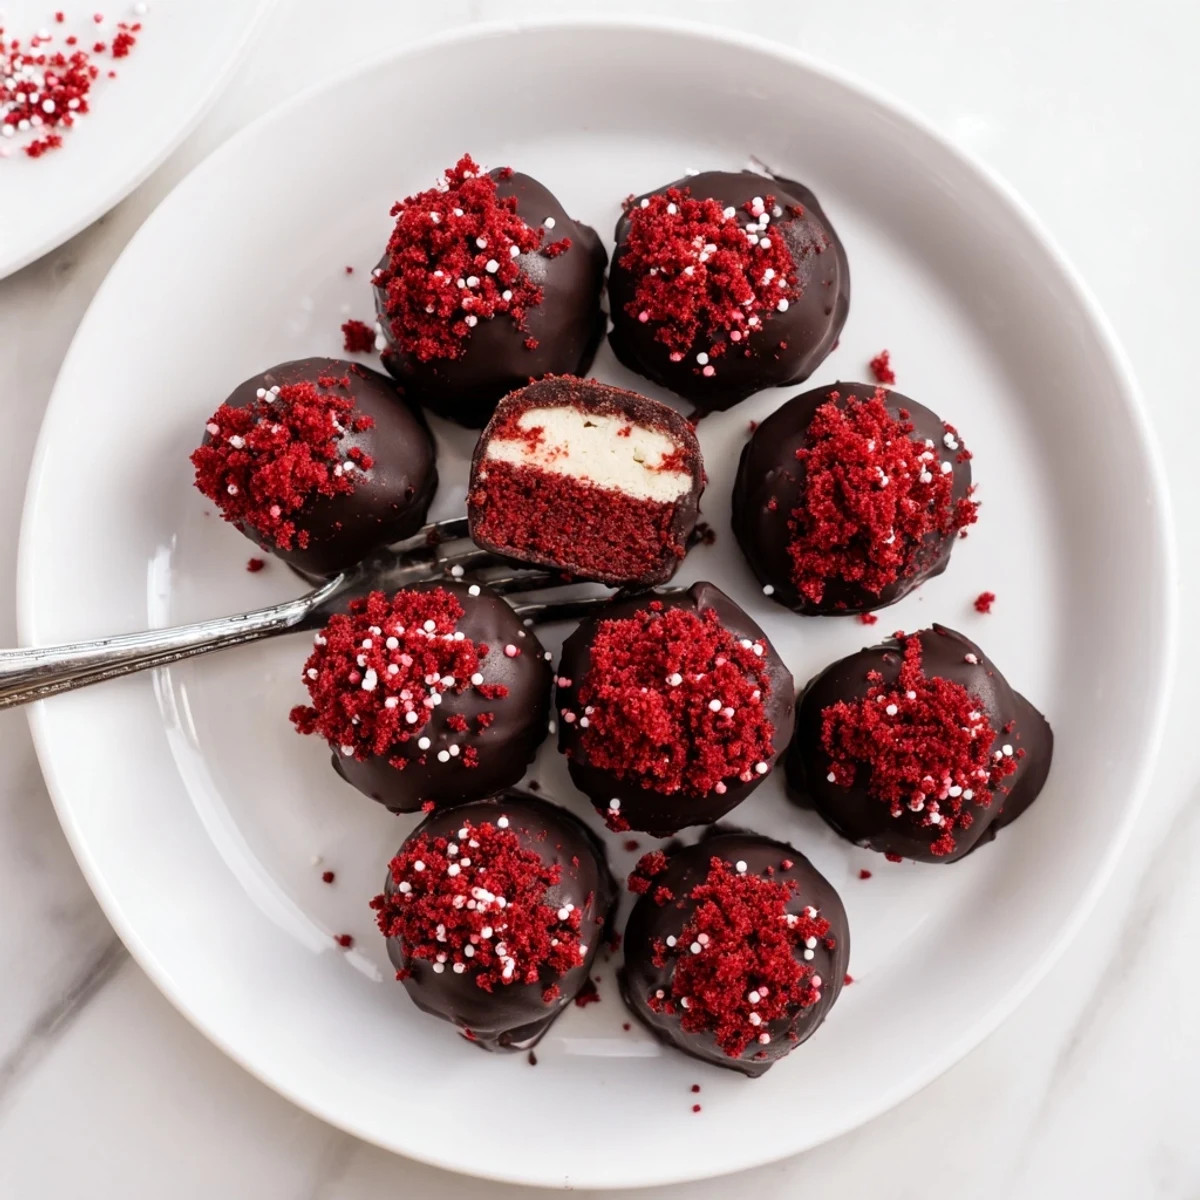
The process begins with baking a tender red velvet cake, which gets crumbled and mixed with a sweetened cheesecake mixture. After shaping into uniform balls and chilling until firm, each piece gets dipped in melted white or dark chocolate for that signature coating.
Perfect for entertaining, these handheld treats come together with just 30 minutes of active preparation. The chocolate shell adds satisfying snap while protecting the soft, cake-and-cheesecake center inside.
The oven timer went off at midnight and my kitchen looked like a crime scene, red batter smeared across the counter and a single wooden spoon standing upright in the mixing bowl. I had volunteered to bring something decadent to my friends potluck the next day and somehow convinced myself that combining two desserts into one bite sized treat was a reasonable idea at 11pm on a Thursday. The result was a tray of ruby hued cheesecake stuffed truffles that disappeared before the main course even made it to the table.
My neighbor Patty knocked on my door the morning after that potluck holding an empty container and asking if there were any hiding in my fridge. That container had been full when she left her house the night before. I told her she would have to wait for the next batch, which I ended up making the following weekend because her disappointed face haunted me.
Ingredients
- All-purpose flour (1 1/4 cups, 160 g): Provides the tender crumb structure for the cake base, and sifting it first makes a noticeable difference in how soft the final balls turn out.
- Granulated sugar (3/4 cup, 150 g): Sweetens the cake without making it overly sweet since the cheesecake and chocolate coating each add their own sweetness layers.
- Unsweetened cocoa powder (2 tbsp, 16 g): Just enough to give that subtle chocolate undertone that defines red velvet, so do not be tempted to add more or the balance shifts.
- Baking soda (1/2 tsp): Gives the cake a gentle lift without making it too spongy, which matters because dense cake crumbles into a better truffle texture.
- Salt (1/4 tsp): A pinch of salt wakes up the cocoa flavor and keeps everything from tasting flat.
- Buttermilk, room temperature (1/2 cup, 120 ml): The acidity in buttermilk reacts with the cocoa to deepen the color and tenderize the crumb, and room temperature buttermilk blends more evenly into the batter.
- Unsalted butter, softened (1/2 cup, 110 g): Softened butter creams properly with the sugar to create air pockets, and unsalted lets you control the final salt level.
- Large eggs, room temperature (2): Room temperature eggs incorporate smoothly into the batter without causing the butter to seize or curdle.
- Vanilla extract (1 tsp): Real vanilla extract rather than imitation makes a quiet but real difference in the background flavor.
- Red food coloring (1 tbsp): This amount gives a vivid crimson without tasting metallic, though gel coloring is more concentrated if you prefer to use less liquid.
- Cream cheese, softened (8 oz, 225 g): Full fat cream cheese creates the richest filling and softens most evenly when left out for about 45 minutes rather than microwaved.
- Powdered sugar (1/4 cup, 30 g): Sweetens the cheesecake filling gently without adding any graininess that granulated sugar would leave behind.
- Vanilla extract for filling (1/2 tsp): A smaller amount in the filling keeps the vanilla from competing with the tang of the cream cheese.
- White or dark chocolate, chopped or melting wafers (10 oz, 285 g): Melting wafers are more forgiving than chopped chocolate, but either works as long as you melt slowly and stir gently to avoid seizing.
- Red or white sprinkles (optional): Entirely optional but they add a festive finish that makes each ball look like a tiny wrapped gift.
Instructions
- Bake the Red Velvet Cake:
- Preheat your oven to 350°F and line an 8x8 inch pan with parchment, letting the edges hang over like handles. Whisk the flour, sugar, cocoa powder, baking soda, and salt in one bowl, then blend the buttermilk, butter, eggs, vanilla, and red food coloring in another until the mixture looks like a vivid sunset. Fold the wet into the dry just until combined and pour into the pan, baking for 18 to 20 minutes until a toothpick slides out with only a few moist crumbs. Let it cool completely because patience here determines whether your balls hold together later.
- Whip Up the Cheesecake Filling:
- Beat the softened cream cheese with powdered sugar and vanilla until the mixture is silky and lump free, scraping down the bowl halfway through to catch any stubborn bits. If it feels too soft to hold its shape, give it 15 minutes in the fridge to firm up before moving on.
- Form the Balls:
- Crumble the cooled cake into fine pieces in a large bowl, then add the cheesecake mixture and work it together with your hands until it forms a dough that holds when squeezed. Roll into one inch balls and set them on a parchment lined sheet, then freeze for a full hour until they are firm enough to survive dipping without falling apart.
- Dip and Decorate:
- Melt the chocolate in a microwave safe bowl in 20 second bursts, stirring between each one until the chocolate flows like warm caramel. Lower each frozen ball into the chocolate using a fork, tap off the excess, and place it back on the parchment, adding sprinkles immediately before the shell sets. Let them rest at room temperature or in the fridge until the coating hardens into a satisfying snap when you bite into one.
 Save
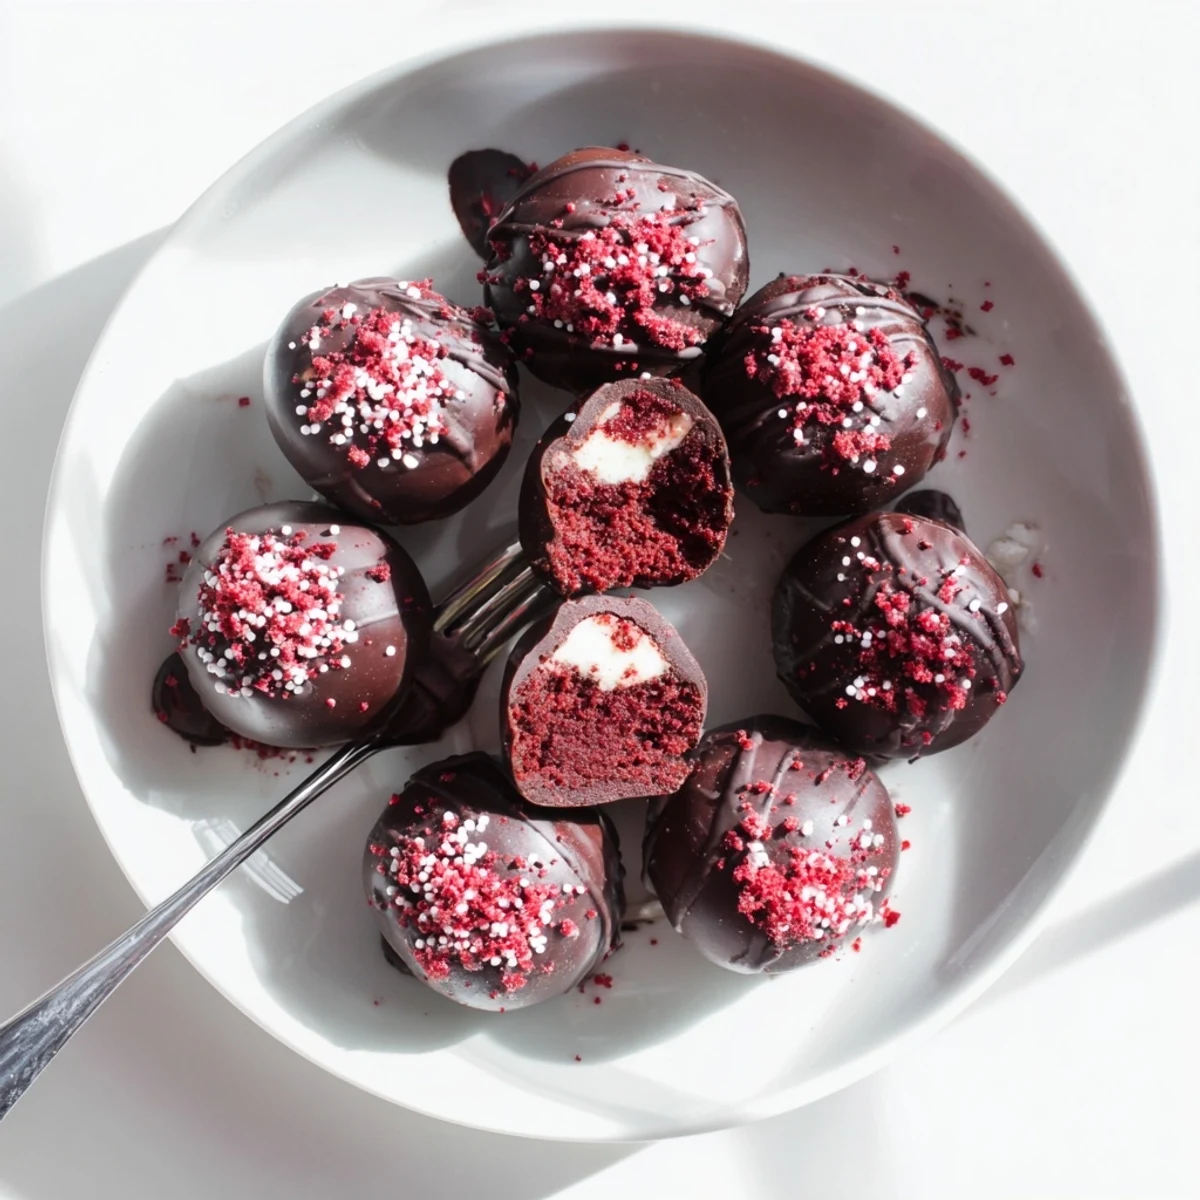
Save I brought a batch of these to my sisters baby shower and watched her mother in law, who famously never touches dessert, eat four of them while pretending to arrange the napkins. Sometimes food does not need an occasion, it creates one.
How to Store Them So They Last
These cheesecake balls keep beautifully in an airtight container in the refrigerator for up to a week, though in my experience they rarely survive three days. The chocolate shell protects the filling from drying out and actually firms up the texture in a way that makes each bite more satisfying on day two. For longer storage, freeze them in a single layer on a sheet pan before transferring to a freezer bag, where they will keep for up to a month. Let frozen balls thaw in the fridge overnight rather than on the counter so the chocolate does not sweat and bloom.
Choosing Your Chocolate Coating
White chocolate gives a creamy sweetness that lets the red velvet color peek through at the edges and looks beautiful with red sprinkles. Dark chocolate creates a more sophisticated contrast with a slight bitterness that balances the sweet cake and tangy cheesecake. Ruby chocolate sits right in the middle with a fruity tang that complements the cocoa notes, and I discovered this combination by accident when that was the only chocolate left in my pantry during a late night craving. Melting wafers are the most foolproof option because they contain stabilizers that help the coating set with a glossy shine and a firm snap.
Making Them Your Own
The base recipe is a canvas that welcomes all kinds of creative spins once you feel confident with the process. A splash of Chambord or Baileys Irish Cream in the cheesecake filling turns these into something truly special for adult gatherings, though start with just a tablespoon because too much liquid will make the filling too soft to roll. You can also press a single frozen raspberry or a chocolate chip into the center of each ball before freezing for a hidden surprise. Crushed graham crackers rolled onto the outside before the chocolate sets give a cheesecake crust effect that people always ask about.
- Try half white chocolate and half dark chocolate dipped balls on the same tray for a striking presentation.
- A tiny flaky sea salt sprinkle on top of dark chocolate coated balls creates an addictive sweet and salty contrast.
- Always taste your cream cheese cold before using it, because even a slightly off batch will throw off the entire flavor of the filling.
 Save
Save Every time I make these, someone asks for the recipe before the tray is half empty, and I always write it out on whatever scrap of paper is nearby. They are proof that the best desserts do not need to be complicated, they just need to be made with intention and shared with people who appreciate a little indulgence.
Recipe Questions & Answers
- → How long do red velvet cheesecake balls stay fresh?
-
Store these treats in an airtight container in the refrigerator for up to one week. For longer storage, freeze them for up to one month. Thaw frozen balls in the refrigerator overnight before serving.
- → Can I use cake mix instead of homemade red velvet cake?
-
Absolutely. A standard red velvet cake mix works perfectly as a time-saving alternative. Prepare according to package directions, cool completely, then crumble and proceed with the cheesecake mixture as directed.
- → What chocolate coating works best?
-
Both white and dark chocolate create delicious coatings. White chocolate provides a sweet contrast to the tangy cheesecake, while dark chocolate offers a richer, more intense flavor. Chocolate melting wafers tend to set more smoothly than chopped bars.
- → Why do my cheesecake balls fall apart when dipping?
-
This typically happens when the mixture hasn't chilled long enough. Freeze the shaped balls for at least one hour until completely firm. Work in small batches, keeping remaining balls frozen until ready to dip. If the dough feels too soft initially, add more crumbled cake.
- → Can I make these ahead for a party?
-
These are excellent make-ahead treats. Prepare and coat them up to three days before your event, storing in the refrigerator. The chocolate coating actually improves with a day or two of setting time. Bring to room temperature 20 minutes before serving.
- → What variations can I try?
-
Experiment with different chocolate coatings—ruby chocolate creates a stunning presentation. Add a tablespoon of Bailey's Irish Cream or Chambord to the cheesecake mixture for an adult version. Roll finished balls in crushed nuts, sprinkles, or cookie crumbs for added texture.
