 Save
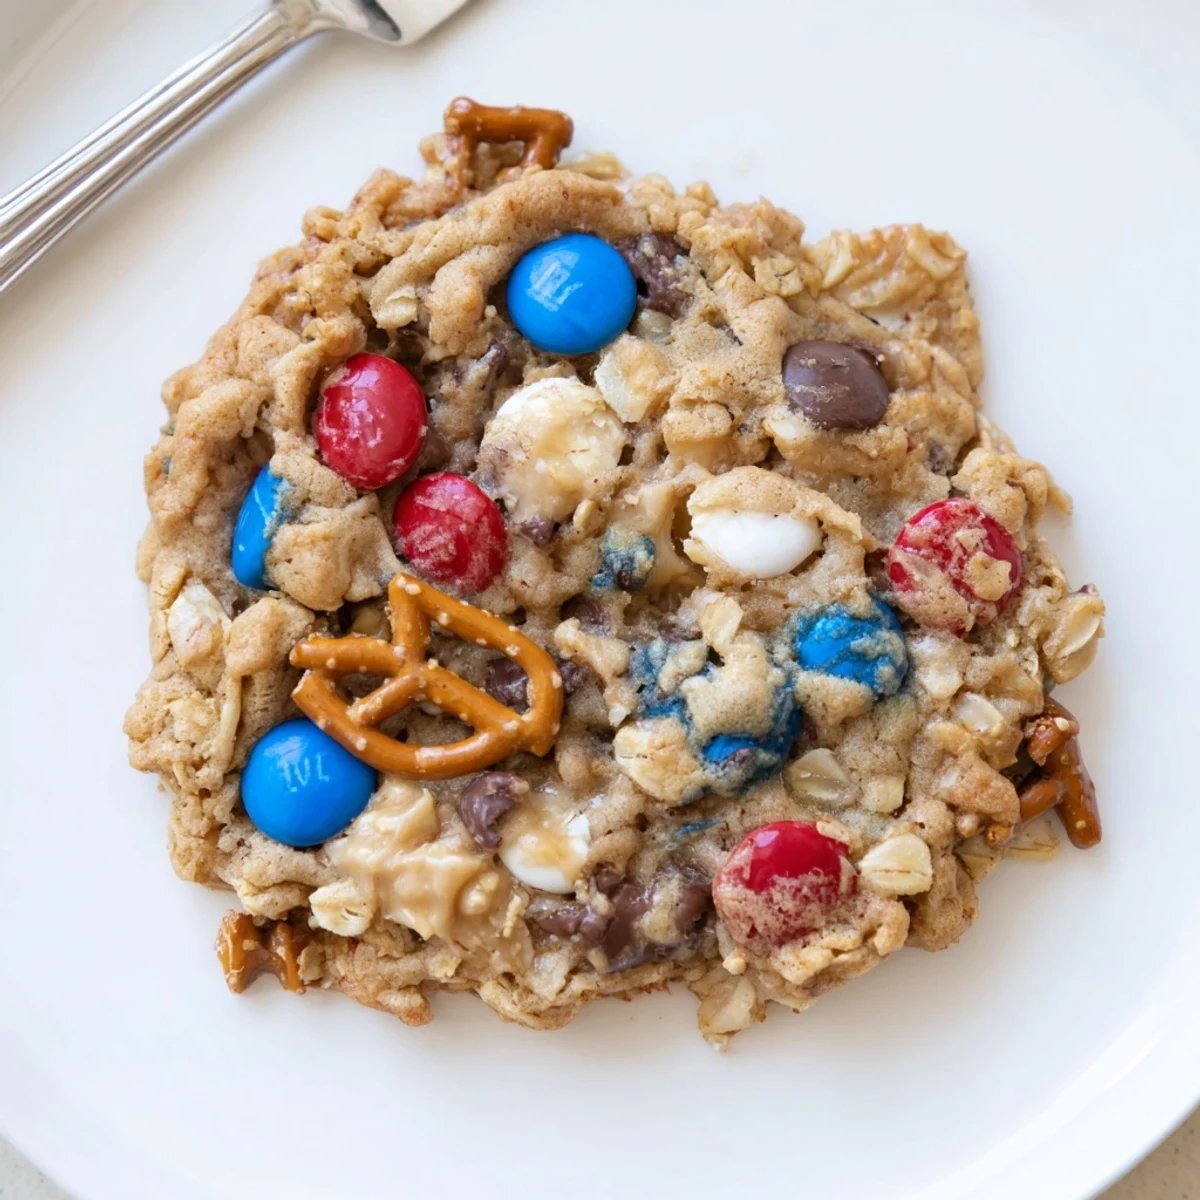
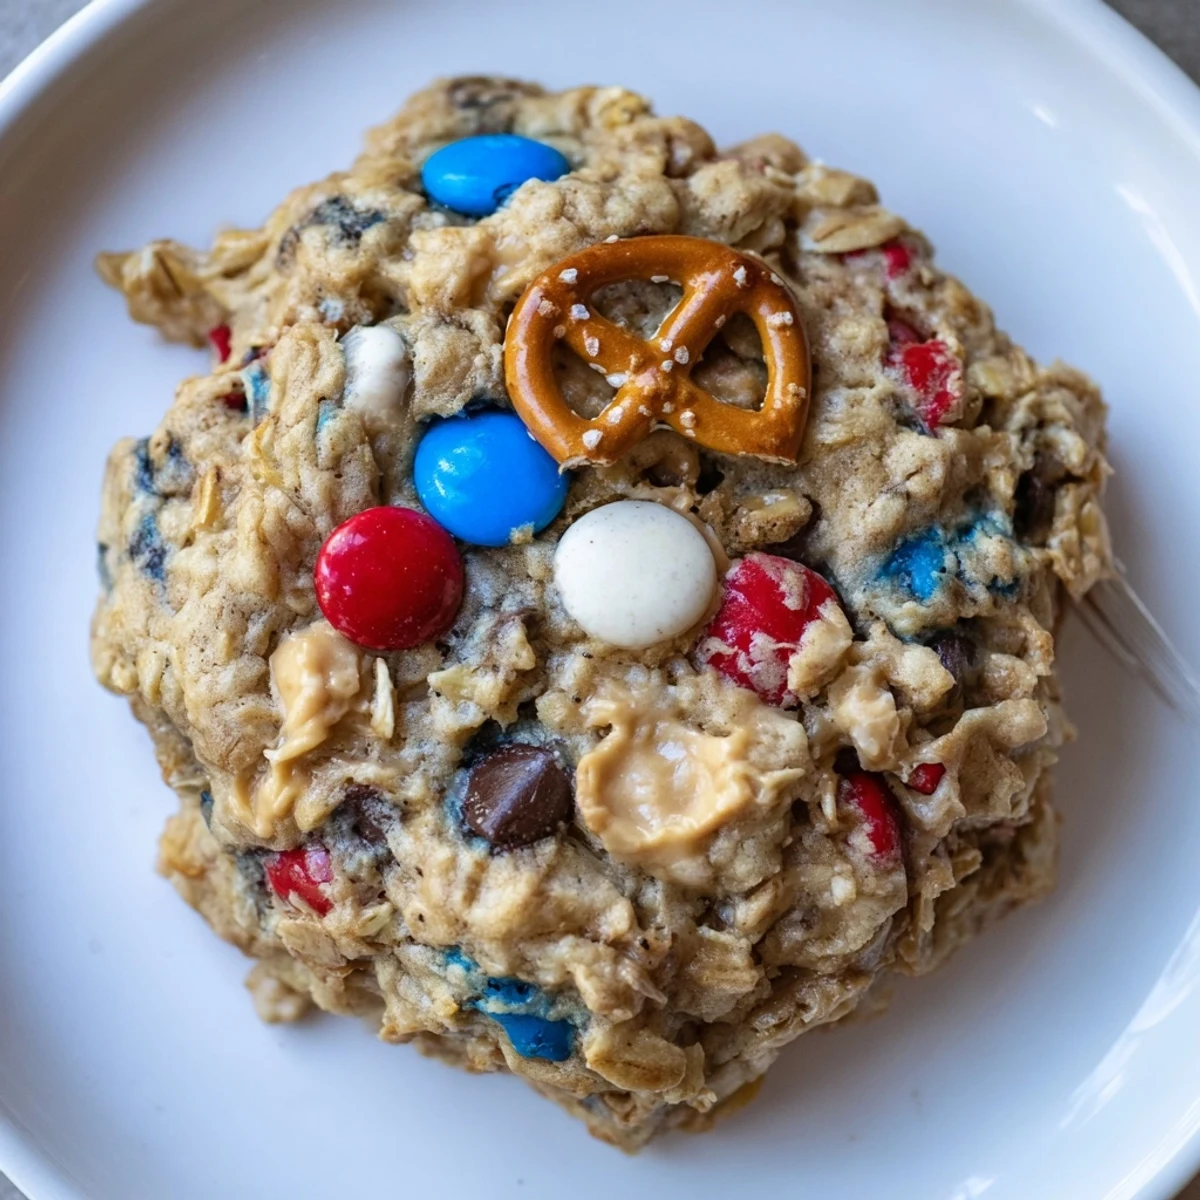
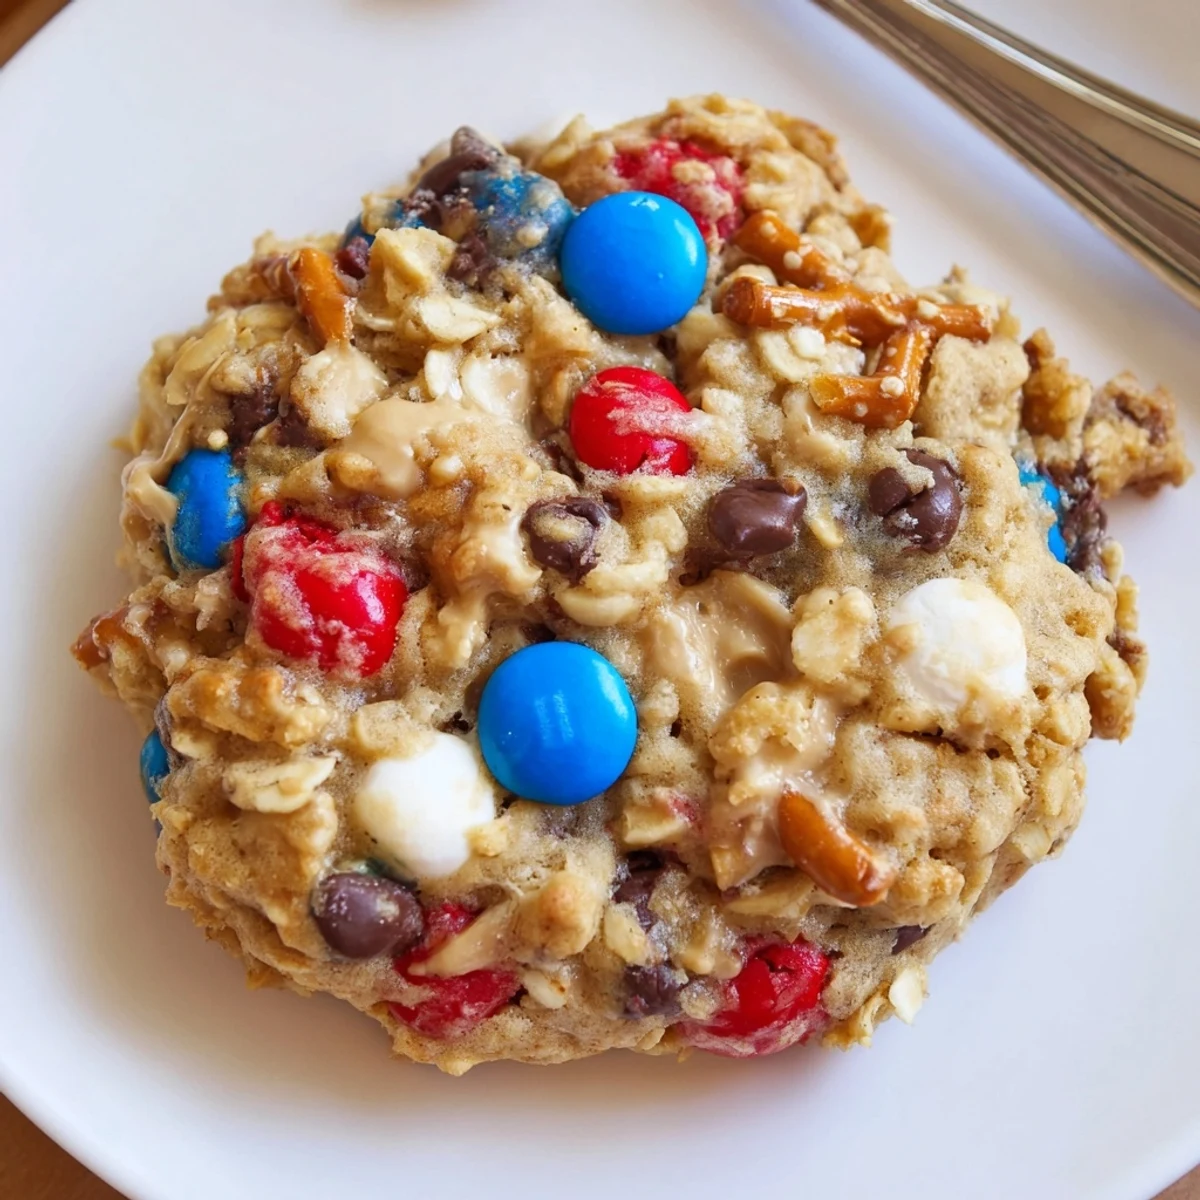
Save These patriotic monster cookies combine oats, creamy peanut butter, and both chocolate chips and red, white, and blue candy for a chewy, crowd-pleasing sweet. Start by creaming butter and sugars, add peanut butter and eggs, fold in dry oats and flour, then stir in candies and chips. Scoop, bake 10–12 minutes, and cool briefly on the sheet for soft centers. Swap nut or gluten-free ingredients as needed.
Once, on a sweltering July afternoon, a chorus of laughter spilled out from my kitchen as I rolled dough studded with red, white, and blue candies. The scent of peanut butter mingled with melting chocolate, making the whole house feel like the inside of a childhood bakery. No fancy equipment, just hands sticky from sneaking a few candies, and music that kept drifting in through open windows. That’s really how these patriotic monster cookies became my party staple—in the burst of a moment, not from a plan.
I still remember my neighbor peeking in, hesitant, as cookie sheets piled up before a block party. Tossing him an apron, he ended up shaping the biggest, most uneven cookie in the batch—and we’ve joked about it ever since. These little memories always seem to tag along with every batch that comes out of the oven for Fourth of July or just because.
Ingredients
- Unsalted butter: Softened butter blends smoother, ensuring every cookie bakes up with that rich, melt-in-your-mouth goodness.
- Granulated sugar & light brown sugar: The right mix gives your cookies those chewy edges and balanced sweetness—don’t skimp on either!
- Creamy peanut butter: I’ve found using a brand with a touch of salt deepens the flavor, and be sure not to use the super-oily, natural stuff for better binding.
- Eggs: Adding them one at a time really does help the dough get fluffy and uniform; I learned that skipping this led to uneven aeration once.
- Vanilla extract: Don’t underestimate a good vanilla—it gives the comforting base to all those mix-ins.
- Old-fashioned oats: Go for the classic rolled oats for the signature chew; quick oats don’t deliver the same heartiness.
- All-purpose flour: Sift it if you can—it helps avoid lumps and gives your cookies a lighter bite.
- Baking soda & salt: Simple, but skipping the salt once made the batch taste oddly flat; a little goes a long way.
- Red, white, and blue chocolate candies: Stir these in gently at the end so they don’t get crushed, and reserve a few for pressing on top before baking for a picture-perfect finish.
- Semisweet chocolate chips: The balance of sweet and slightly bitter; I sometimes toss in an extra handful when feeling decadent.
- Mini pretzels (optional): The salty crunch is surprisingly good, just crush and fold in last so you don’t lose all the chunky pieces.
Instructions
- Get set up:
- Crank the oven to 350°F and line two baking sheets with parchment—this prevents stuck-on, dark bottoms no matter how wild the cookie shapes get.
- Cream away:
- Using your mixer, whip butter and both sugars together until the color turns pale and the texture’s as fluffy as a pillow.
- Blend the wet:
- Mix in the peanut butter, then add eggs one by one with a short mix after each; finally, let a splash of vanilla swirl through.
- Dry mix:
- In a fresh bowl, whisk oats, flour, baking soda, and salt until you see the oats coated and no flour streaks remain.
- Combine the dough:
- Gradually mix the dry bowl into the wet—just until no streaks; don’t overdo it, or you’ll get tough cookies instead of chewy.
- Stir in the fun:
- Gently fold in the candies, chocolate chips, and pretzel bits so every scoop is bursting with color and texture.
- Scoop and space:
- Use a tablespoon or cookie scoop to drop slightly mounded balls of dough, keeping them two inches apart for room to spread.
- Bake & peek:
- Let them bake for 10–12 minutes; when the edges are golden but the centers still look soft and a bit underdone, pull them out.
- Cool completely:
- Give them five minutes to settle on the baking sheet, where they finish cooking gently, then shift to a rack until fully cool (if you can wait that long).
 Save
Save I still laugh about the year these cookies transformed from ‘something to bring’ into the center of a firepit circle, everyone picking out their favorite colored candy bits and trading pieces like cards. That’s when I knew these weren’t just cookies—they were shared moments, baked in red, white, and blue.
When to Get Creative With Your Mix-Ins
The best part is grabbing whatever extra treats are in your pantry: a handful of chopped nuts, a few white chocolate chips, or a scatter of sprinkles. I’ve even chopped up leftover candy bars for a makeshift monster mash-up. The cookies are sturdy enough to hold anything, so don’t be shy mixing and matching as the mood hits.
What Makes a Cookie Chewy or Crispy
If you want chew, just underbake each batch and let them cool completely before moving. For a crispier finish, bake a minute or two longer—your nose (not just the timer) will tell you when edges get nutty and brown. It’s all about the balance between gooey middle and toasty outsides.
Shortcuts For Faster Cookie-Making
Whenever I’m pressed for time, I skip chilling the dough entirely—these cookies hold together just fine. Using a cookie scoop speeds up shaping, and parchment makes cleanup a breeze.
- Keep extra candies for topping just before baking—they look better that way.
- Double the recipe if you want leftovers; nobody has ever complained.
- Let baked cookies rest on the tray before moving, or they’ll break apart when hot.
 Save
Save I hope these cookies become a go-to for your celebrations, or just an afternoon when you need a dash of color and sweetness. Bake, share, and savor every messy, chocolatey moment.
Recipe Questions & Answers
- → How do I keep the cookies chewy?
-
Underbake by a minute or two and cool the cookies on the baking sheet to finish cooking gently. Use a higher ratio of brown sugar, avoid overmixing once the flour is added, and measure flour by spooning and leveling to prevent dryness.
- → Can I swap the peanut butter for another nut spread?
-
Yes. Almond or sunflower seed butter can be used 1:1. Note that different nut butters vary in oil content and flavor; chill the dough briefly if it becomes too soft before scooping and baking.
- → How do I keep the candy colors from bleeding?
-
Fold the candies in at the very end and avoid crushing them. Chilling the dough slightly helps maintain candy shape during baking, and pressing a few whole candies onto warm cookies after baking preserves bright colors.
- → What is the best way to store these cookies?
-
Store cooled cookies in an airtight container at room temperature for up to four days. For longer storage, freeze baked cookies in a single layer on a tray, then transfer to a freezer-safe bag for up to three months. Thaw at room temperature before serving.
- → How can I make a gluten-free version?
-
Use a cup-for-cup gluten-free flour blend and certified gluten-free old-fashioned oats. Let the dough rest briefly to hydrate the flours, which helps achieve a better texture, and monitor bake time as gluten-free mixes can brown differently.
- → Any tips for adding mix-ins or changing chips?
-
Mix-ins like chopped nuts, white chocolate, or pretzels add texture and flavor—reduce the total volume of add-ins slightly to keep dough balance. If using larger chunks, flatten scoops slightly for even baking.
