 Save
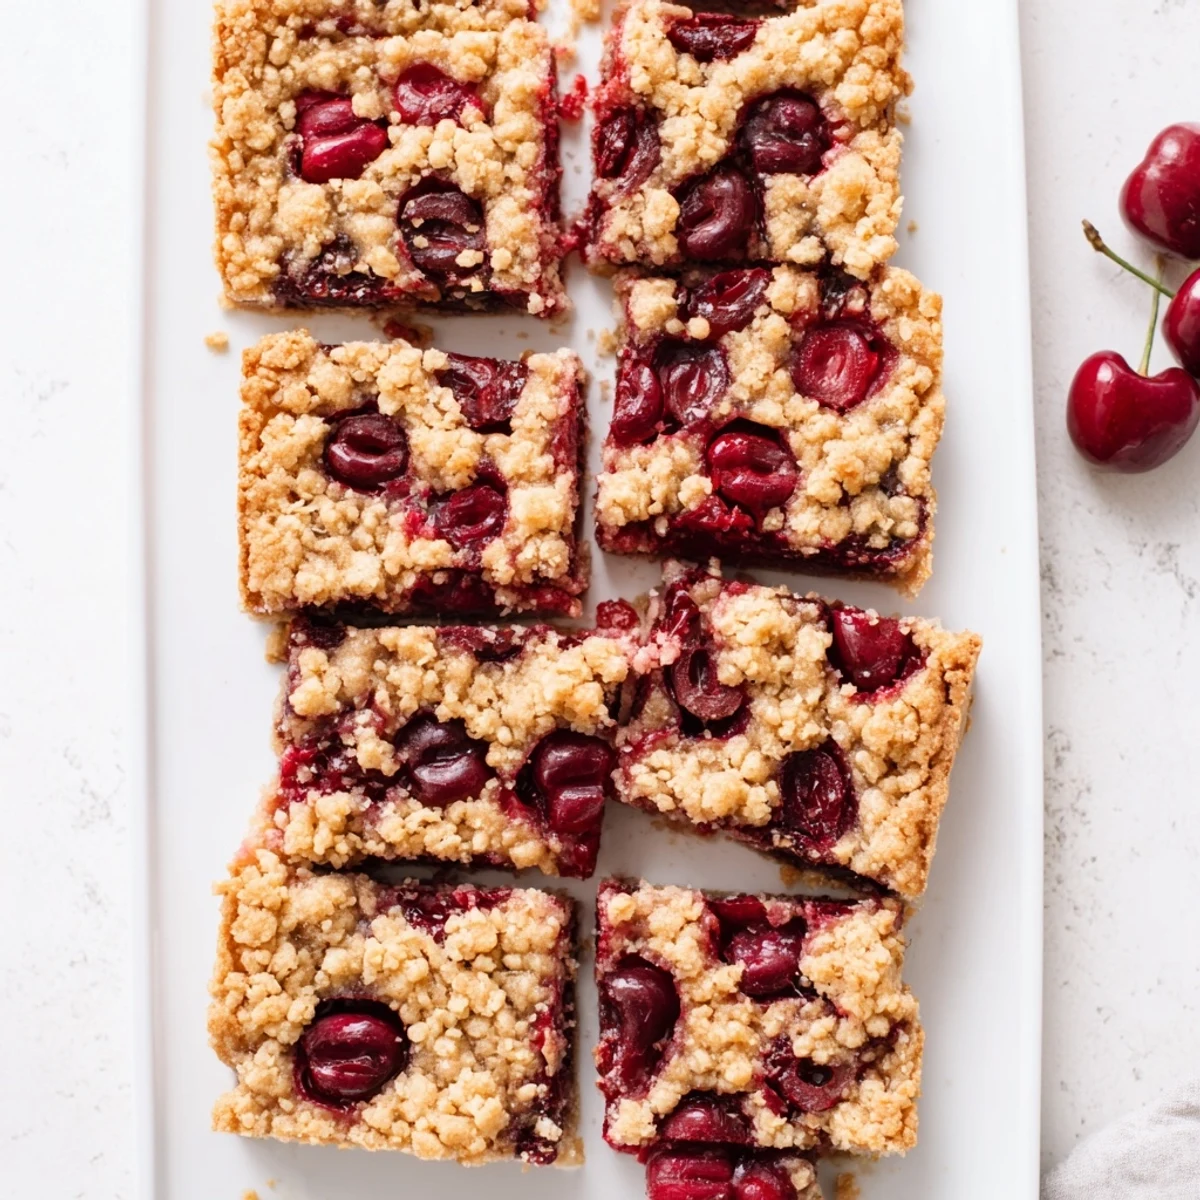
Save These cherry crumble bars feature a buttery, cinnamon-spiced crust with a luscious sweet-tart cherry filling. The texture combines crisp, golden crumble topping with tender fruit underneath. Ready in just over an hour, these bars are incredibly simple to prepare using fresh or frozen cherries.
Press two-thirds of the flour-butter mixture into the pan, spread with the cornstarch-thickened cherry layer, then scatter the remaining crumble over the top. The result is a handheld dessert that's both rustic and refined.
The kitchen was quiet except for the sound of pitting cherries, that satisfying little pop as each one released its stone. My daughter sat across from me, sticky fingers already reaching for the ones that made it into the bowl instead of the baking pan. These bars started as a way to use up an impulse buy of too many cherries from the farmers market, but they have become the most requested summer treat in our house.
I brought these to a fourth of July party last year, still slightly warm because I am terrible at timing. The host nearly forgot to put them out, and when she finally did, they disappeared in minutes while the elaborate cupcakes sat mostly untouched. Sometimes the simplest things hit the hardest.
Ingredients
- 2 cups all purpose flour: The foundation of your crumble, providing structure and that satisfying cookie like texture in the base layer
- 1 cup granulated sugar: Sweetens both the crumble and helps create those irresistibly crispy edges that everyone fights over
- 1/2 teaspoon baking powder: Gives the crust just enough lift to stay tender rather than becoming dense or hard
- 1/4 teaspoon salt: Balances the sweetness and makes all the flavors pop, especially important with the tart cherries
- 1/2 teaspoon ground cinnamon: Adds warmth that plays so nicely with the fruit, like a little hug in the background
- 1 cup unsalted butter cold and diced: Must be cold to create those flaky pockets in the crumble, warm butter will just make it gummy
- 1 large egg: Binds the crumble mixture together so you can press it into the pan without it crumbling apart
- 3 cups pitted fresh or frozen cherries halved: The star of the show, fresh ones are amazing but frozen work perfectly when cherries are not in season
- 1/2 cup granulated sugar: Sweetens the filling just enough to let the cherry flavor shine through without masking it
- 2 tablespoons cornstarch: Thickens the cherry juices as they bake, preventing a soggy bottom layer
- 1 tablespoon lemon juice: Brightens the filling and enhances the natural cherry flavor
- 1/2 teaspoon vanilla extract: Adds depth and rounds out the fruit flavors beautifully
Instructions
- Get your oven ready:
- Preheat to 350°F and line a 9x9 inch pan with parchment paper, letting some hang over the sides like little handles.
- Mix the dry crumble ingredients:
- Whisk flour, sugar, baking powder, salt, and cinnamon in a large bowl until everything is evenly combined.
- Work in the butter:
- Add cold diced butter and the egg, using a pastry cutter or your clean fingers to blend until it looks like coarse crumbs with some pea sized pieces remaining.
- Build the base:
- Press about two thirds of the mixture firmly into the bottom of your pan, really packing it down so it holds together when baked.
- Prepare the cherry filling:
- Toss cherries with sugar, cornstarch, lemon juice, and vanilla until every piece is coated in the mixture.
- Layer it up:
- Spread the cherries evenly over your pressed crust, then scatter the remaining crumble on top like a cozy blanket.
- Bake until golden:
- Bake for 38 to 42 minutes until the top is golden brown and you can see the cherry filling bubbling up through the crumbles.
- The hardest part:
- Let cool completely in the pan before using the parchment handles to lift out and cut into squares.
 Save
Save My mother in law asked for the recipe after trying one at a family gathering, which is basically the highest compliment possible in my family. She makes them now too but claims hers are never quite as good, which I suspect is just her being kind.
Making These Your Own
I have swapped in peaches, blueberries, and mixed berries when cherries were not available or just too expensive. The timing stays the same but watch for bubbling filling as your doneness indicator since different fruits release different amounts of liquid.
Storage Secrets
These actually improve after a day in the fridge, the flavors meld and the texture becomes even more cookie like. Layer them between parchment paper in an airtight container and they will last up to five days, though they have never made it past day two in my house.
Serving Suggestions
These are perfect on their own but a scoop of vanilla ice cream while they are still slightly warm is pretty much heaven. They also pair beautifully with afternoon coffee or packed in a picnic basket for summer adventures.
- Dust with powdered sugar right before serving for a bakery style finish
- Try swapping almonds into the crumble for some crunch and nutty flavor
- These freeze beautifully wrapped individually for quick lunchbox treats
 Save
Save There is something so satisfying about a recipe that looks impressive but comes together with such simple ingredients and techniques. Hope these become a summer staple in your kitchen too.
Recipe Questions & Answers
- → Can I use frozen cherries instead of fresh?
-
Yes, frozen cherries work perfectly in this dessert. Thaw them slightly and drain any excess liquid before tossing with the sugar and cornstarch mixture to prevent a soggy bottom crust.
- → How should I store these bars?
-
Keep them in an airtight container at room temperature for up to 3 days. For longer storage, refrigerate for up to a week or freeze individually wrapped bars for up to 3 months.
- → Can I make these gluten-free?
-
Absolutely. Substitute the all-purpose flour with a quality 1:1 gluten-free flour blend. The texture and flavor remain excellent, making these suitable for gluten-free guests.
- → What other fruits can I use?
-
Mixed berries, blueberries, raspberries, or sliced stone fruits like peaches and plums all work beautifully. Adjust the sugar slightly based on the fruit's natural sweetness.
- → Why is my filling too runny?
-
The cornstarch needs to reach a boil while baking to properly thicken the fruit juices. Ensure the bars bake until the filling is actively bubbling around the edges, and let them cool completely before cutting.
